Here's a couple small updates before we really start ramping up the actual "installation" process. We're still in the preparation stages right now.
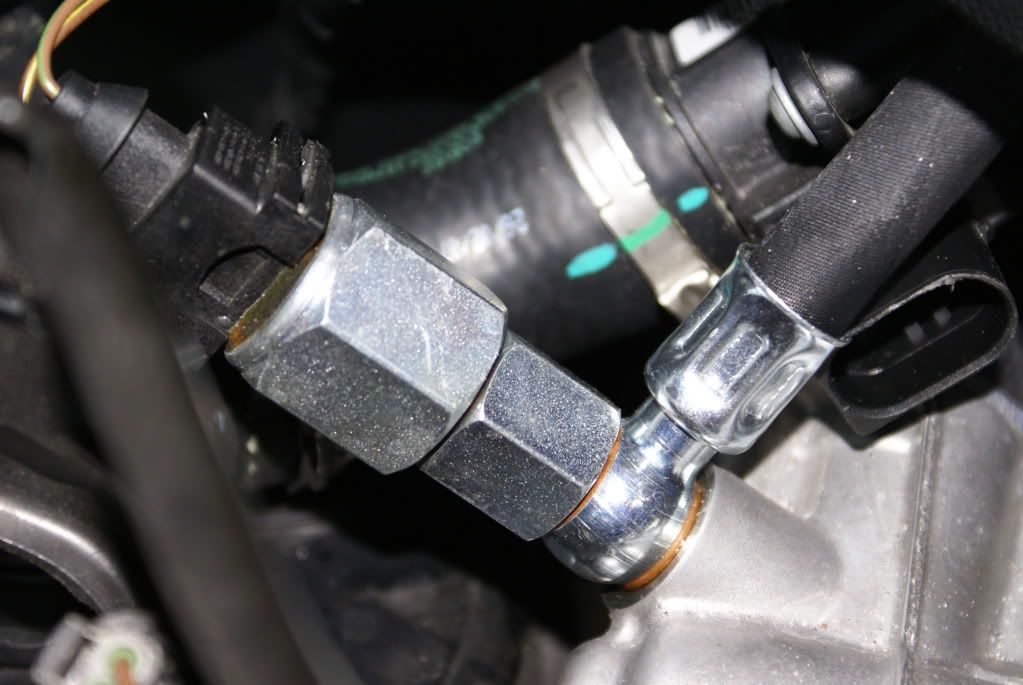
We've routed the oil lines for the superchargers, as they use engine oil. Below you can see a banjo fitting coming off the filter housing, which tees off to both blowers above.
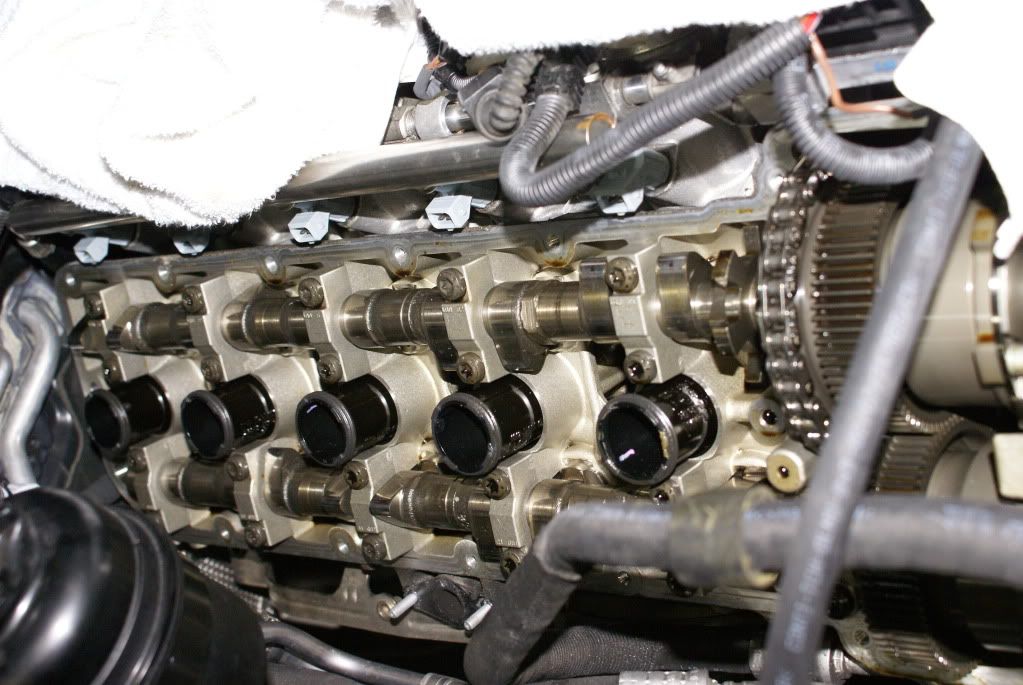
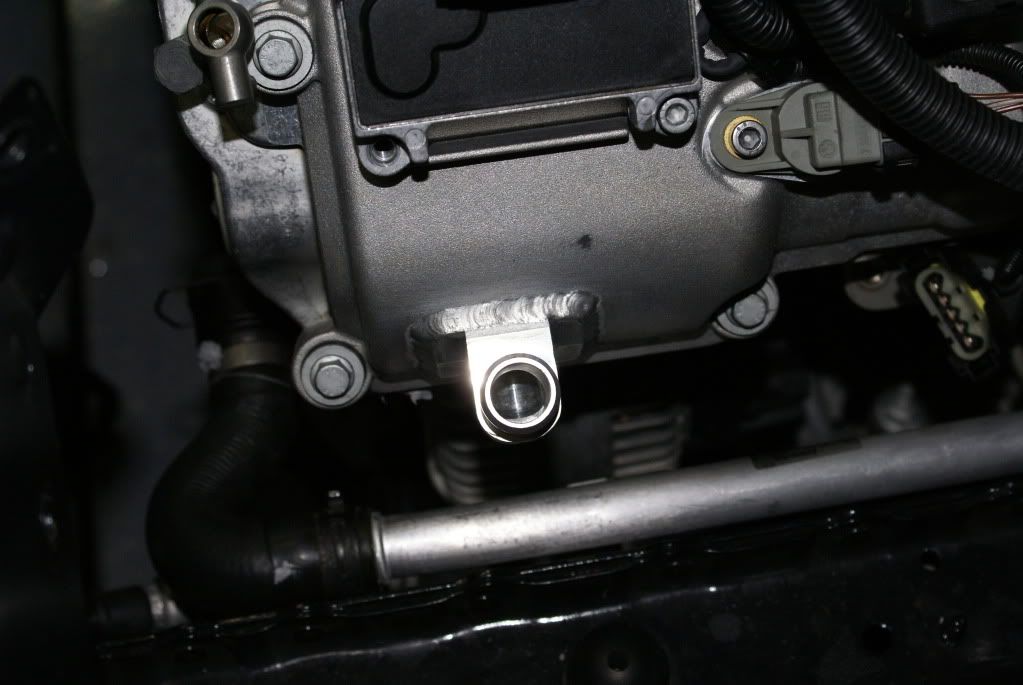
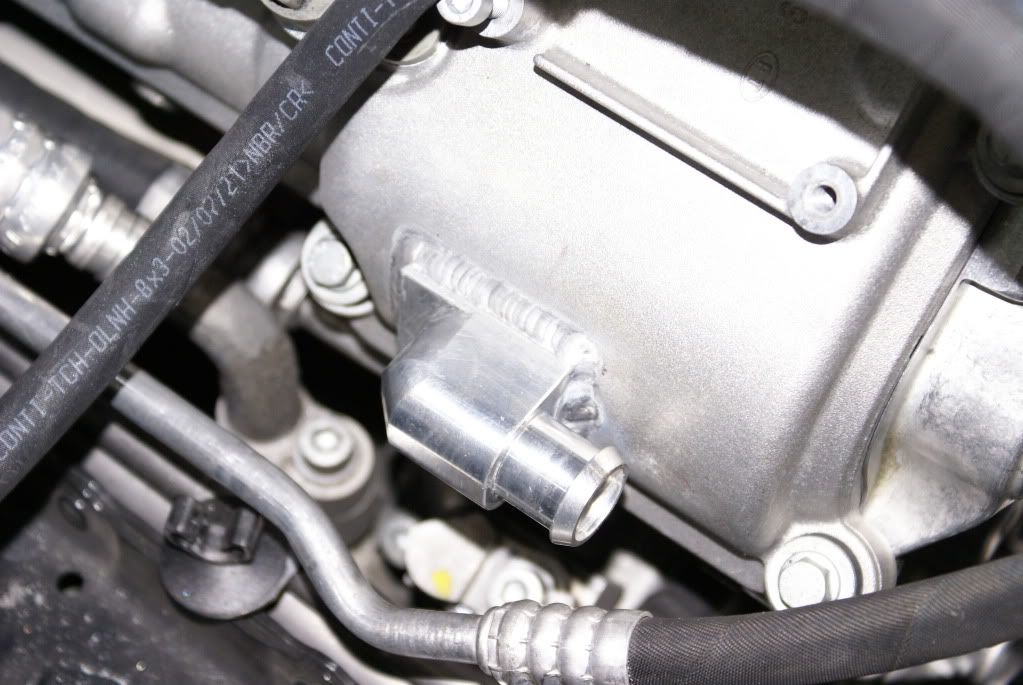
For the oil RETURN from the blowers, the oil drains from the superchargers into the valve covers to re-enter the system. Per G-Power's recommendation, they have you drill a hole on each valve cover, then epoxy a fitting for each return as well. Our shop is known to take a few extra steps on installation, and give each install, no matter how "off the shelf" a kit may be, our own touch. Instead of using sloppy adhesive for the fittings, we chose to TIG weld them to the valve covers; we think it looks much more professional for a kit of this caliber. Here's a couple pictures of what I'm talking about.
Valve covers removed:
Driver's side valve cover with new oil return fitting TIG welded in place:
Passenger side with it's respective fitting:
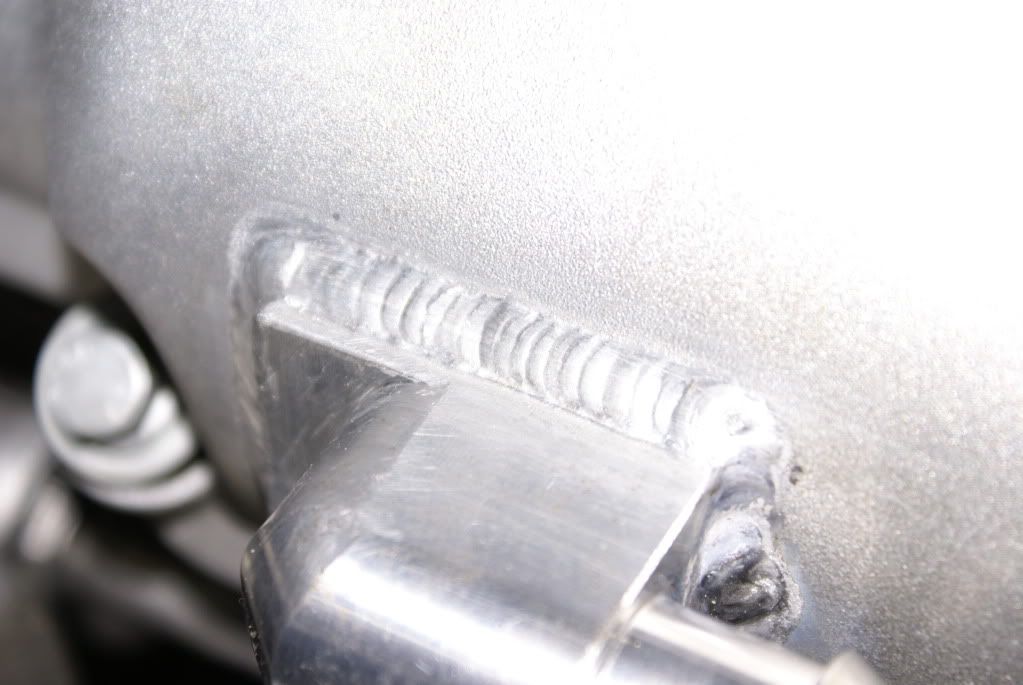
Close up of welding. Yes, it's billet welded to cast. . .as long as the preparation is done right, it is possible.
A bit more work has been done on the gauge pod as well. Remember this is no where near done, but just something to give you the idea of the shape and placement, here's a picture:
close up:
Remember, almost nothing is final with the pod, there is still much work to be done to make it "complete." There will be more updates mid-week, so be sure to check back in!
...petrolhead 2007 E60 M5 Black Sapphire|Indianapolis Red
Thanks for all the kind words and subscriptions everyone! It's much appreciated!
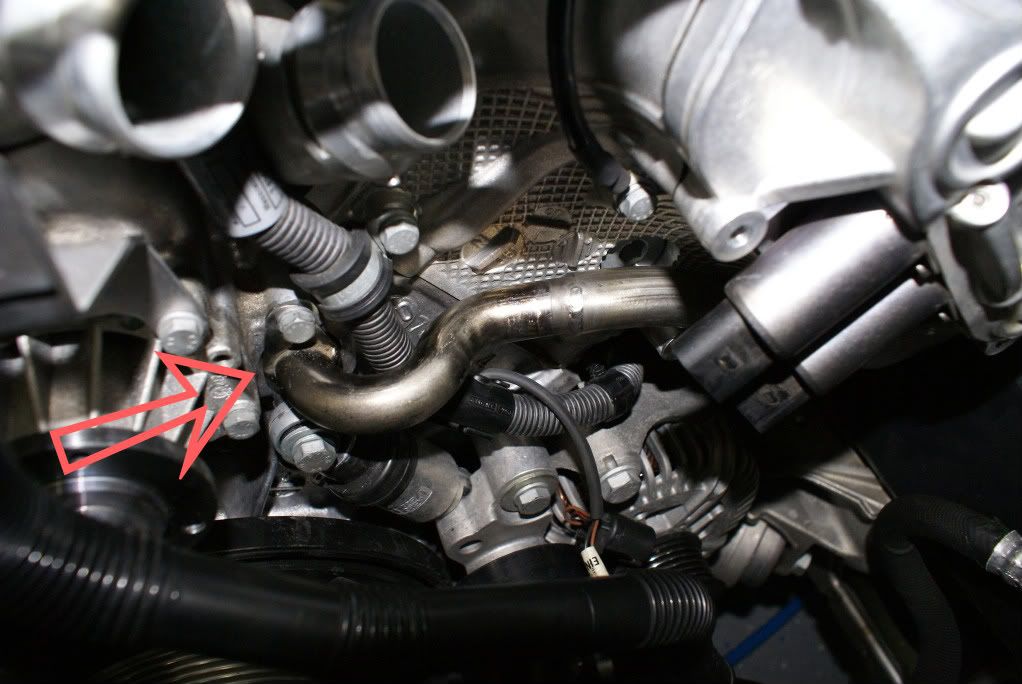
Although this seems like a minor thing to have finish, it's a big relief for us here at the shop to get this out of the way and pretty much done. As we've highlighted, the coolant system is heavily modified on the drivers side, coming off the water pump and going to the expansion tank, more specifically. The OEM hard line coming off the water pump clearly would sit in the way of the supercharger bracket, so G-Power had supplied us with a new one to re-route it out of the way. This line needed to be tweaked a bit to fit just right on the motor, and once it did, we were able to start getting to work on the rest of the coolant system.
Here's a picture of the new, single fitting, coolant line off the water pump in place(red arrow pointing at it to help):
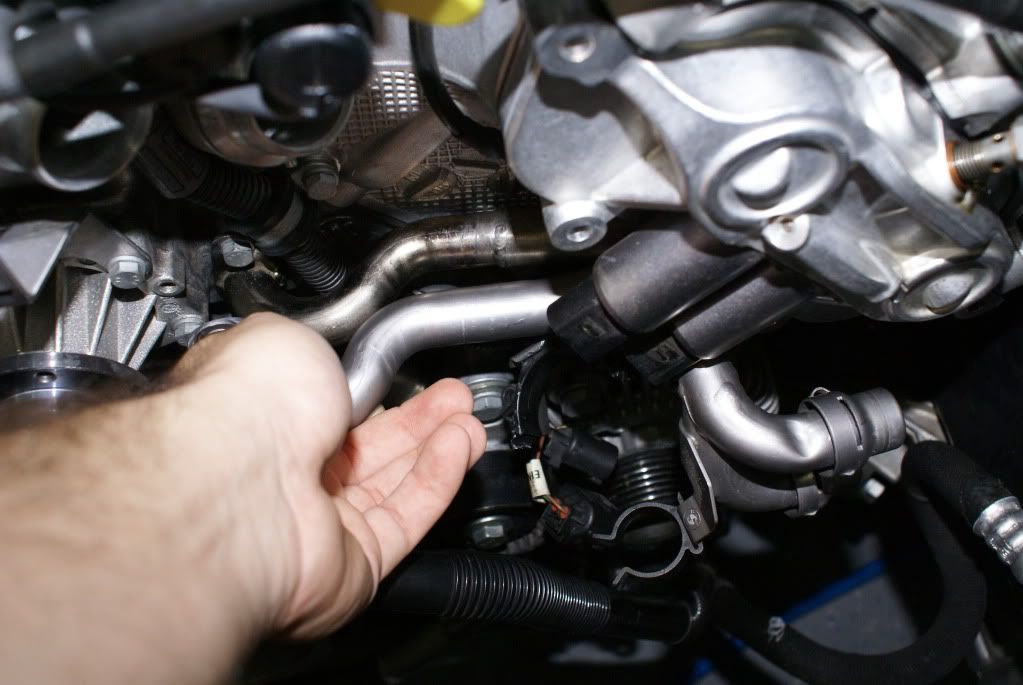
A quick comparison shot of the OEM one held next to it, to show you the difference of where they each rest, and how it's been moved away from the OEM point. Note again, 2 fitting on the OEM piece versus 1 on the new piece.
Here's where the new piece routes to, again pointed out. Note again our significantly shortened hardline to the right. . .this will soon tie back into the system.
After some careful trimming of OEM hoses, we now have roughly what the completed section will look like. Of course there will be several clamps on the hoses and fittings, and it will be much cleaner when it's "final," but for now, you can see how the machined aluminum splitter brings the expansion tank back into the picture, and frees up space for the bracket and airbox on the driver's side.
The next order of business will be 2 coolant lines going in and out of the radiator on the passenger side, that update will be coming shortly.
Here is a quick picture showing the cut part of the body on the passenger side, now smoothed and rounded edges for a more OEM look. The paint was still wet in this pic, so it's a lot more noticeable here than in person currently. It was painted not to leave any "bare" or "exposed" edges, and for a more clean look.
Lastly, here's one quick picture of the current status of the gauge pod; it's really looking great in my opinion! Still work to be done on it. . .
As always, more and more updates on the way shortly!
...petrolhead 2007 E60 M5 Black Sapphire|Indianapolis Red
Well, we've been really busy at the shop with our normal flow of traffic. . .suspension, exhaust work, and some maintenance thrown in the mix. This has resulted in us staying extraordinarily late to work on the M5, and give it our full attention, instead of trying to work on it in between smaller jobs.
We're pretty far along now, and this will be a decent update, along with another one which will be occuring within the next 2-3 days when we're expected to have the intake manifolds put on.
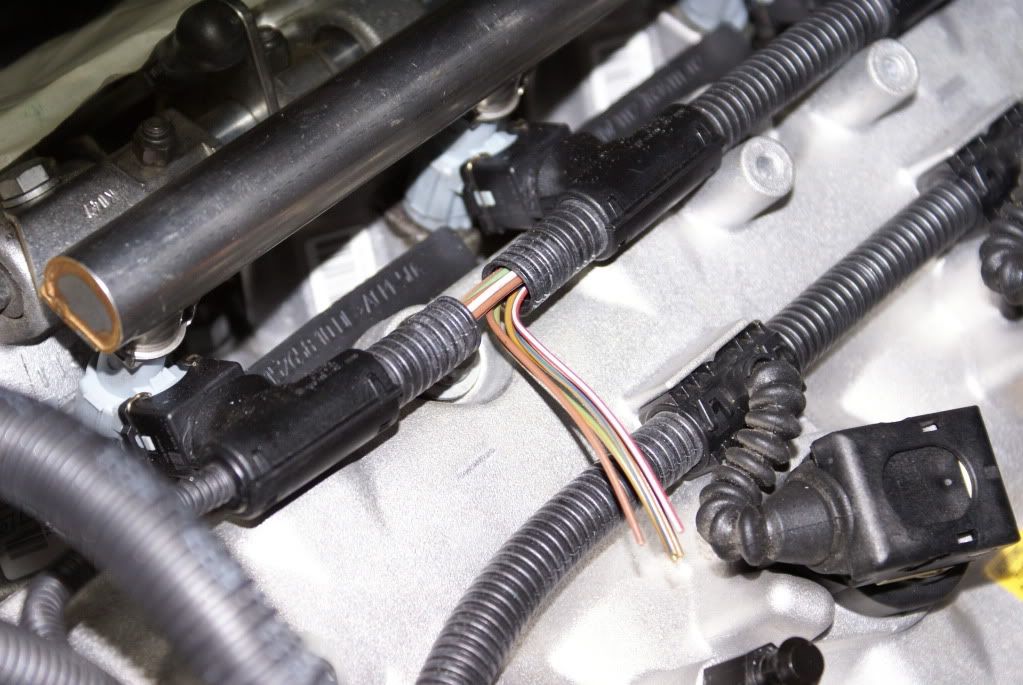
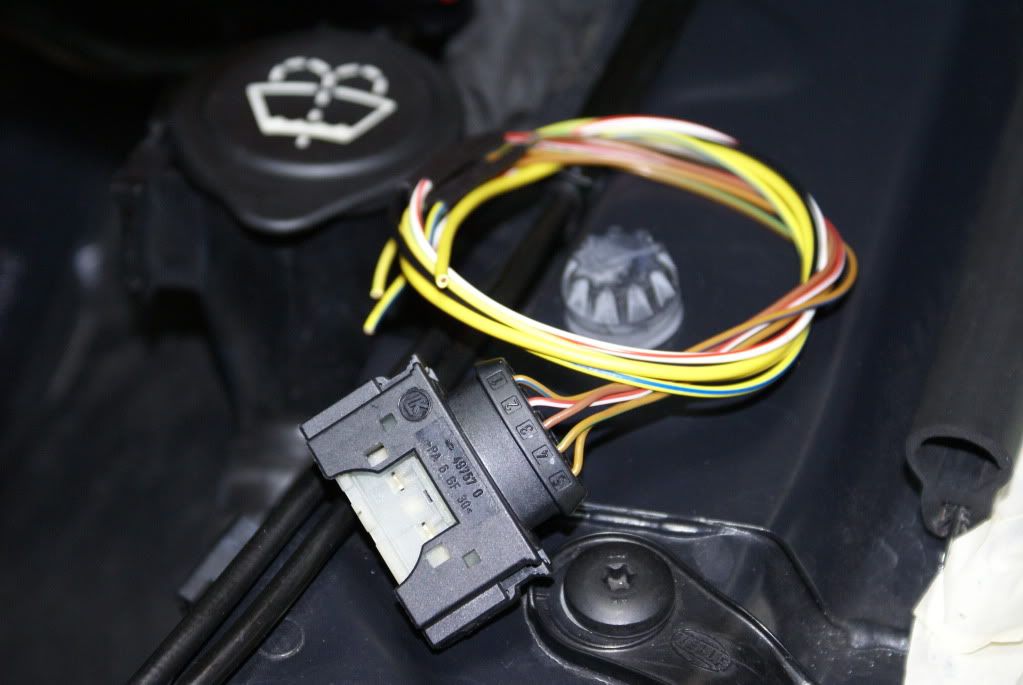
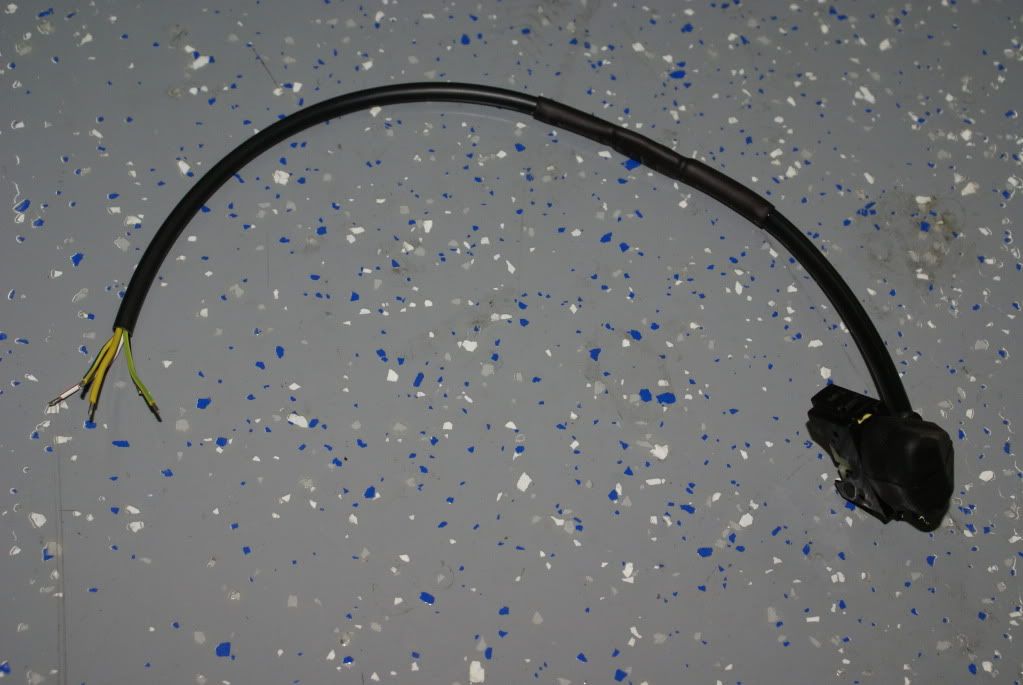
The mass air flow sensors were very short from the factory, and since now there is MUCH more stuff in the way, along with the MAF being located much further away, we had to extend the MAF sensors.
MAF sensor wiring cut on the body, with tips soaked in solder:
wiring away from the body, attached to sensor, with the extended section soldered in:
extension complete, with tips ready to be soldered to cut section on the body:
OEM jacket back on the connector:
We're now 100% done with the coolant modifications. The custom cast aluminum piece that rests on the passenger side bracket really is a cool thing - it "flattens" the flow of coolant around the area where the belt will now be, so there are no worries of a belt hitting a rubber hose with coolant in it. Here's what it looks like done:
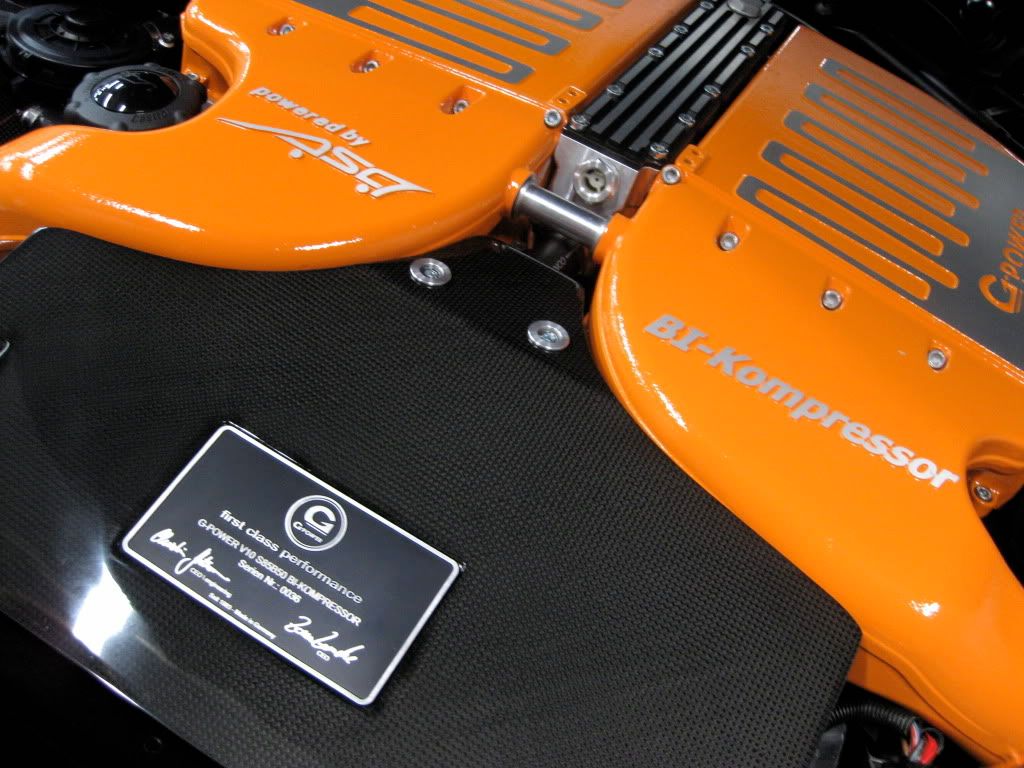
It's really cool to see how all the brackets, intakes, superchargers etc all get supported, and rely on one another for rigidity. This was a really difficult piece to set up - it is a "bridge" of sorts that goes across the middle of the motor, and proves a space for the passenger side intake manifold to be supported in the back. on each side, between the last 2 throttle bodies, a bolt holding the idle air control, and 2 nuts holding the throttle bodies are removed, like shown here:
now the new adaptor for the "bridge" is fitted in place:
the bridge section put on, and we're complete; note the oil drains plugged with custom machined billet pieces:
the piece on the intake manifold that will screw into the bridge, complete with 2 rubber grommets for shock absorption:
yet another tie in piece on the driver's side manifold, which will hit the passenger side manifold, as well as the back of the water reservoir:
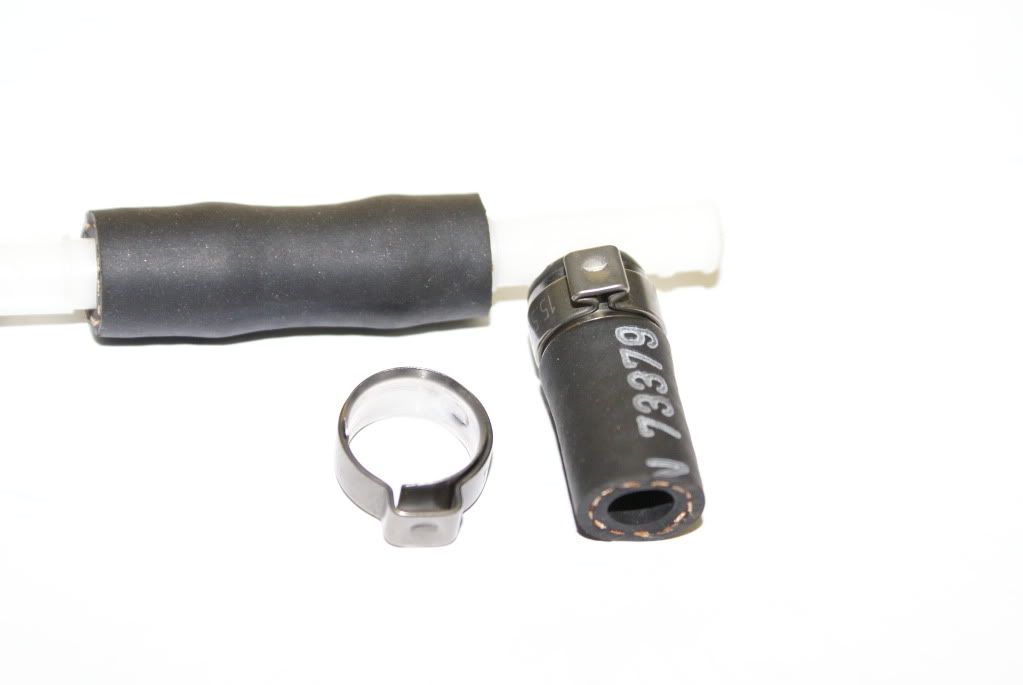
Lastly, we took on the vacuum lines, which were teed off to run up to the bypass valve on each intake manifold. They were cut, and recrimped using OEM clamps(which requires a special tool to crimp properly,) and run up front.
cut section near idle control line:
clamps used, crimped and uncrimped for example:
new piece fit into place, ready to use:
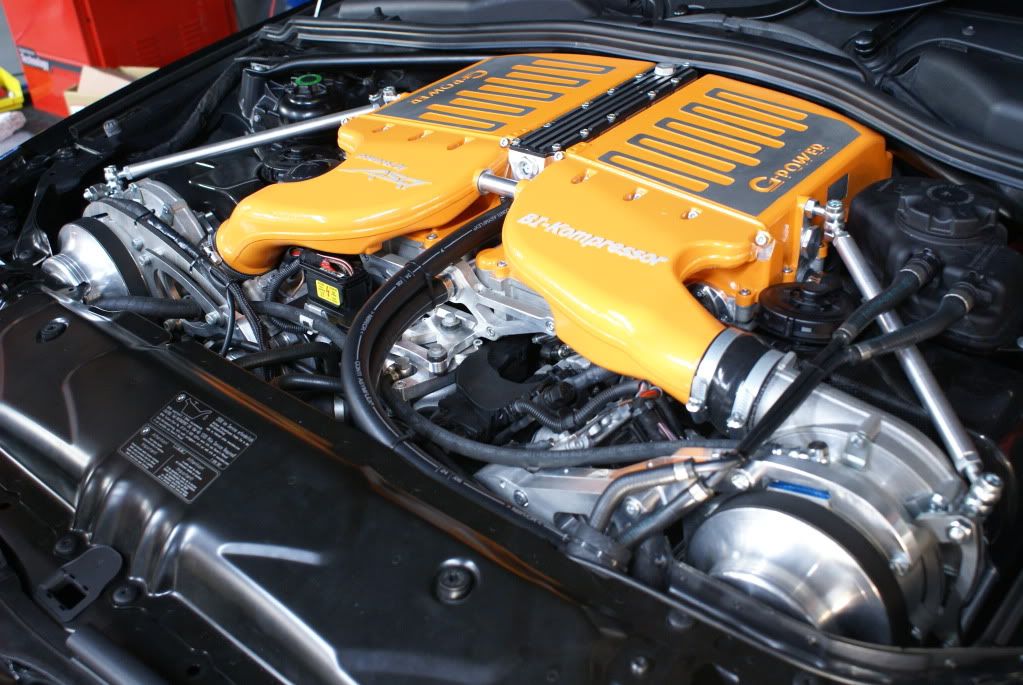
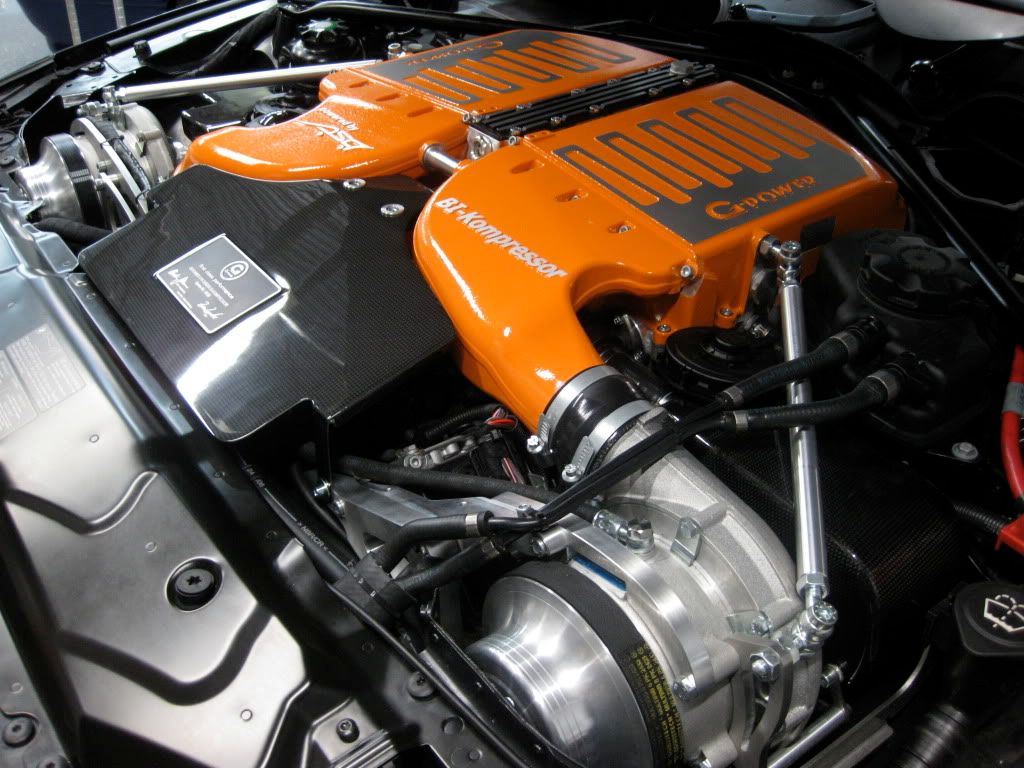
That concludes this update. . .well, i'll throw in one last teaser for the post, here is the COMPLETED driver's side blower, expansion tank, and carbon airbox. You can see why that massive battery cable now runs backwards instead of down; everything is truly a TIGHT fit!
More soon!
...petrolhead 2007 E60 M5 Black Sapphire|Indianapolis Red
2004 X5, HAMMAN - SOLD
2006 Z4M - SOLD
1967 SHELBY GT500CR - SOLD
2001 Ferrari 550 Maranello - SOLD
2001 Ferrari 456 MGTA - CURRENT
2006 Hummer H3 -CURRENT
2003 Citroen Saxo 1.1 - Special Mongol Rally 2012 - SOLD TO CHARITY
1997 E36 M3 - PROJECT CAR
2008 Ferrari 312 Scaglietti - CURRENT
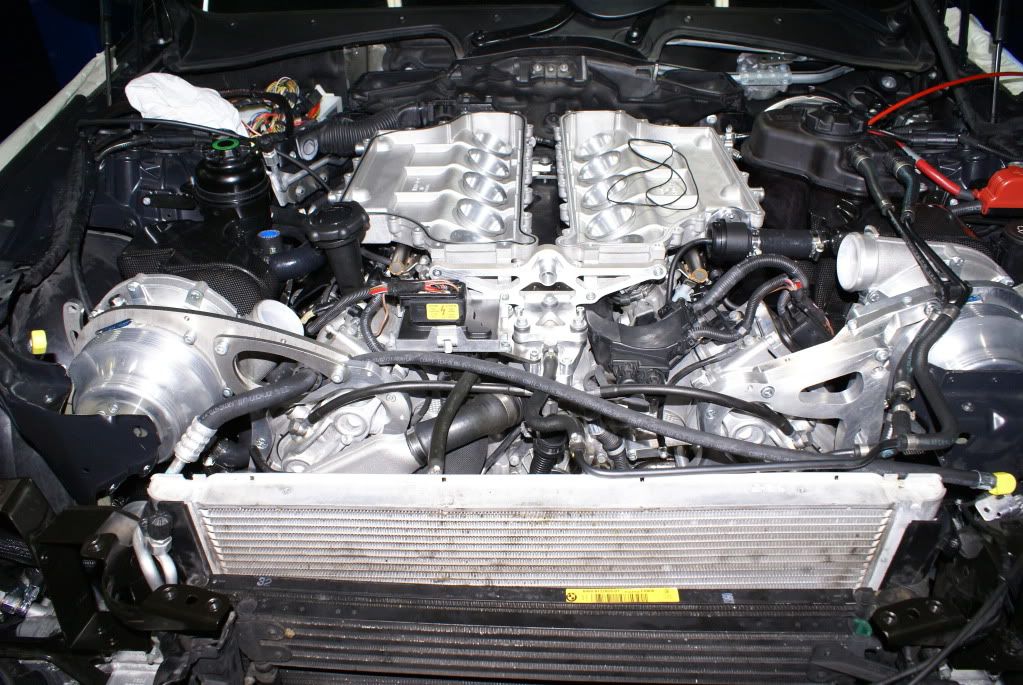
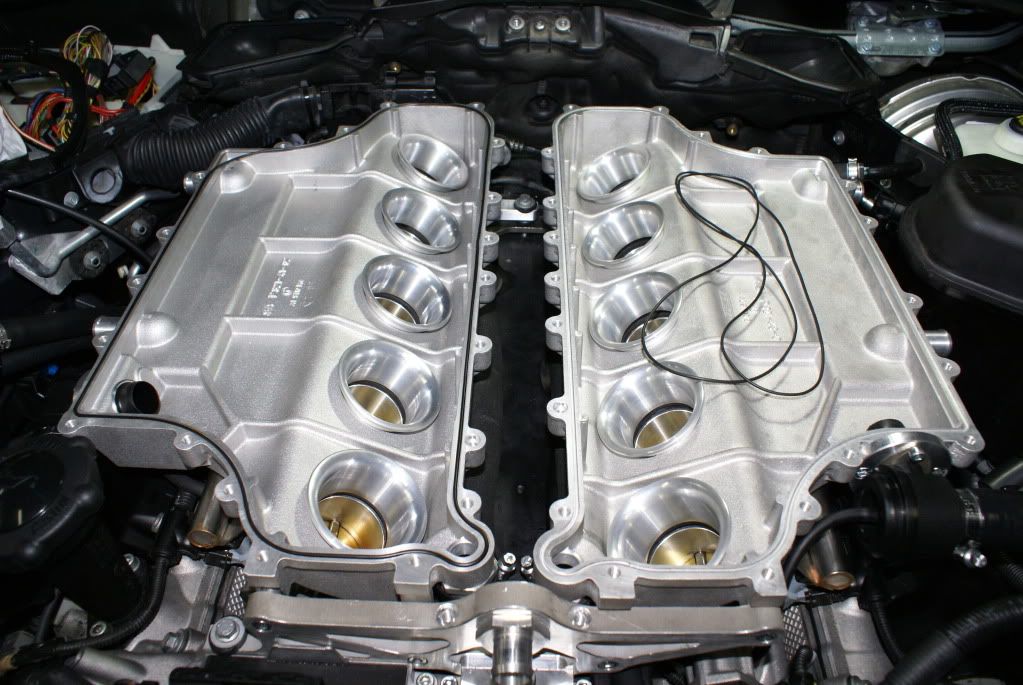
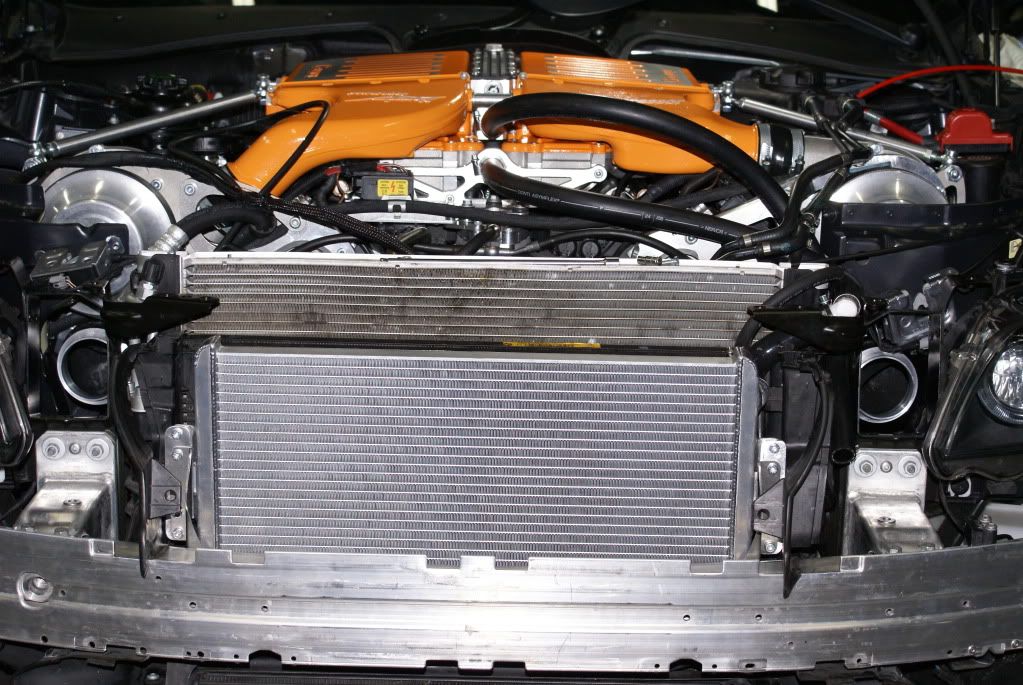
Here's update on the current status of the installation. The superchargers are currently in place, 100% permanently. The oil feed and return lines have been routed to their final resting place (feed lines not tightened down yet,) and the a/c hard lines up front have been EXTREMELY bent and modified to fit and not rub the 2 new idler pulleys on the passenger side bracket. The carbon airboxes are also on and secure, as is the expansion tank, and plastic covers for the coils on each valve cover.
One royal pain is getting these 2 huge manifolds on the throttle bodies. Having them seat properly and then tighten the clamps was not fun at all - and now since we had to take both manifolds apart, we have the daunting task of routing the massive "o-rings/gaskets" on them.
Here's what the engine bay currently looks like:
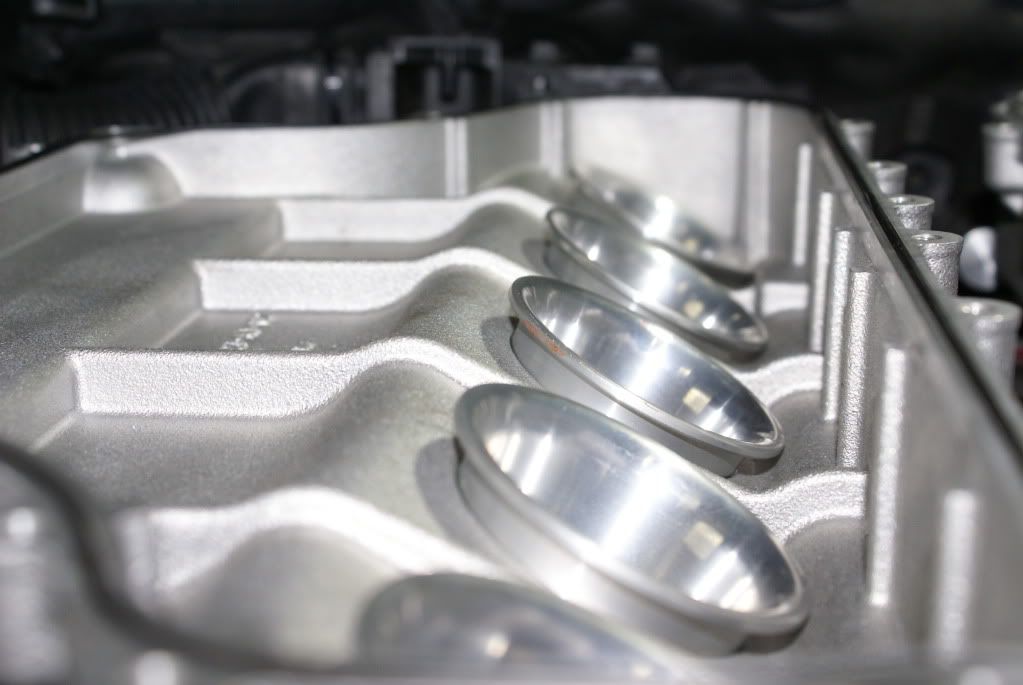
New machined billet velocity stacks, which will sit below the charge coolers:
On passenger's side, o-ring slightly short but ready to be stretched into place and the top half assembly be bolted down. Untouched o-ring in driver's side
Bypass valve visible here, with vacuum line connected. Pretty carbon airbox visible as well.
A goodie for the M5 that came in yesterday, will be installed fairly soon. . .can you guess what it is?
Our goal is to have the car running tomorrow or friday. . .then start the re-installation of the stock stuff, along with wiring up the gauges & weld a bung in the X pipe for the wideband. We'll see if we can make that happen, seems like all the really difficult stuff is done with.
...petrolhead 2007 E60 M5 Black Sapphire|Indianapolis Red
As we move closer to completion, we're really getting excited to see how things will turn out, and starting to up the level of our attention to detail to ensure things are absolutely perfect for the customer.
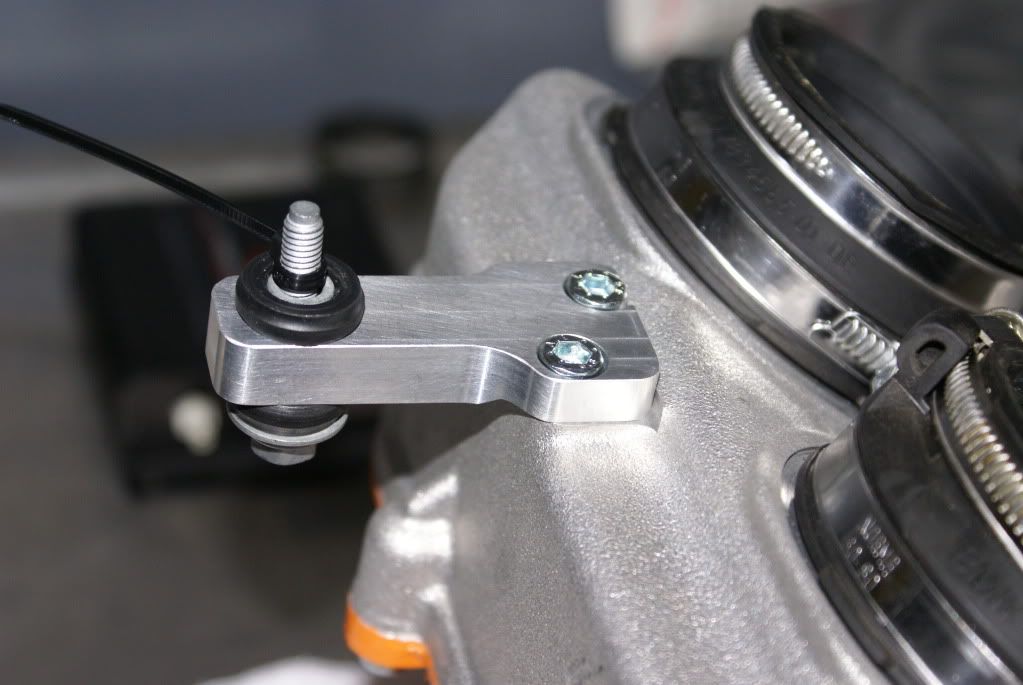
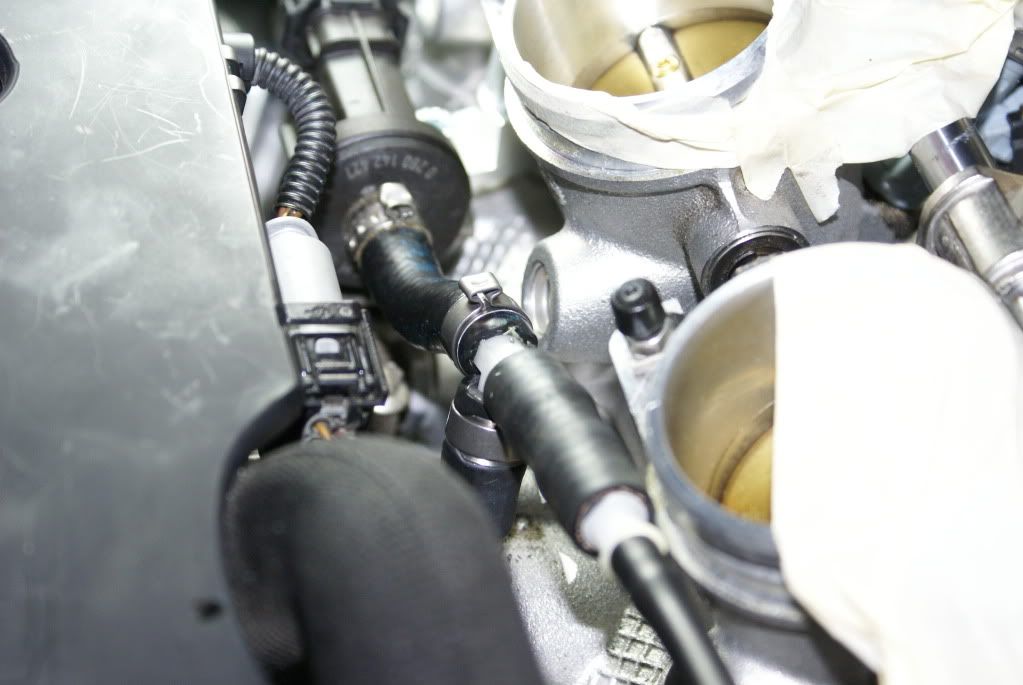
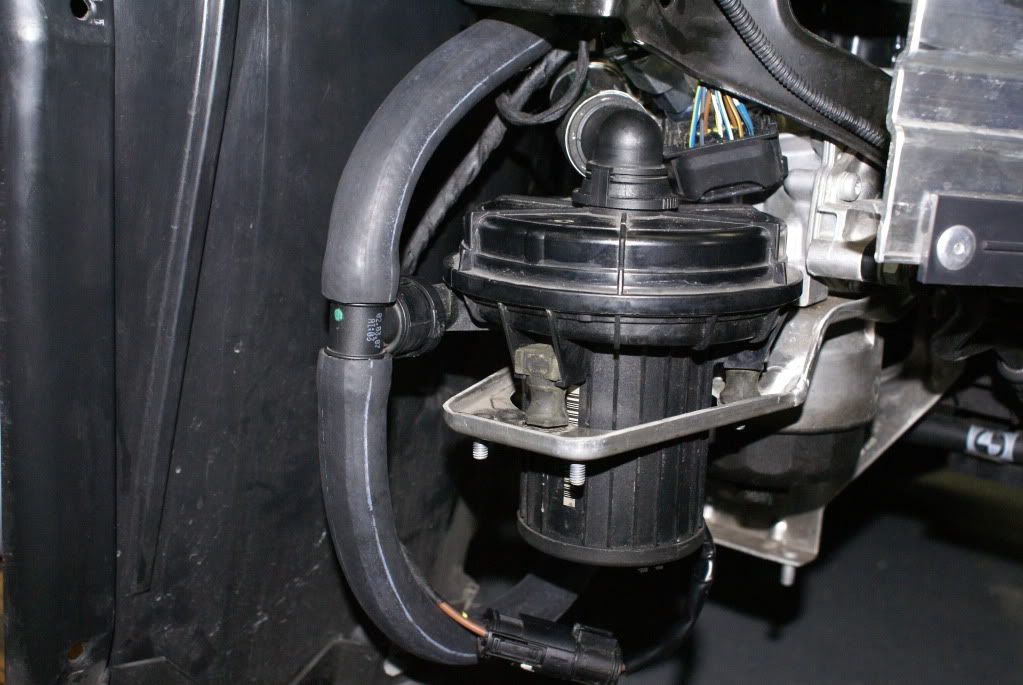
One inherent problem that was kind of a last minute thing for us to realize, is the routing of the secondary air system. Even though the car currently has no catalytic converters, the surveillance of the secondary air system is still enabled in the tune, so it MUST be run. The OEM secondary air line is brittle and does not want to bend very easily. Our solution was some rubber heater hose, using all OEM BMW secondary air fittings and tees. The objective was to use something OEM looking, and flexible as well the ability to resist kinking. Shown here is the secondary air pump, you will notice 2 things right off the bat - 1) the material of the new hose vs OEM, 2) an OEM tee used off the pump versus a 90 degree fitting which is OEM.
passenger side connected to valve on the head, along with the other line be routed to the other side:
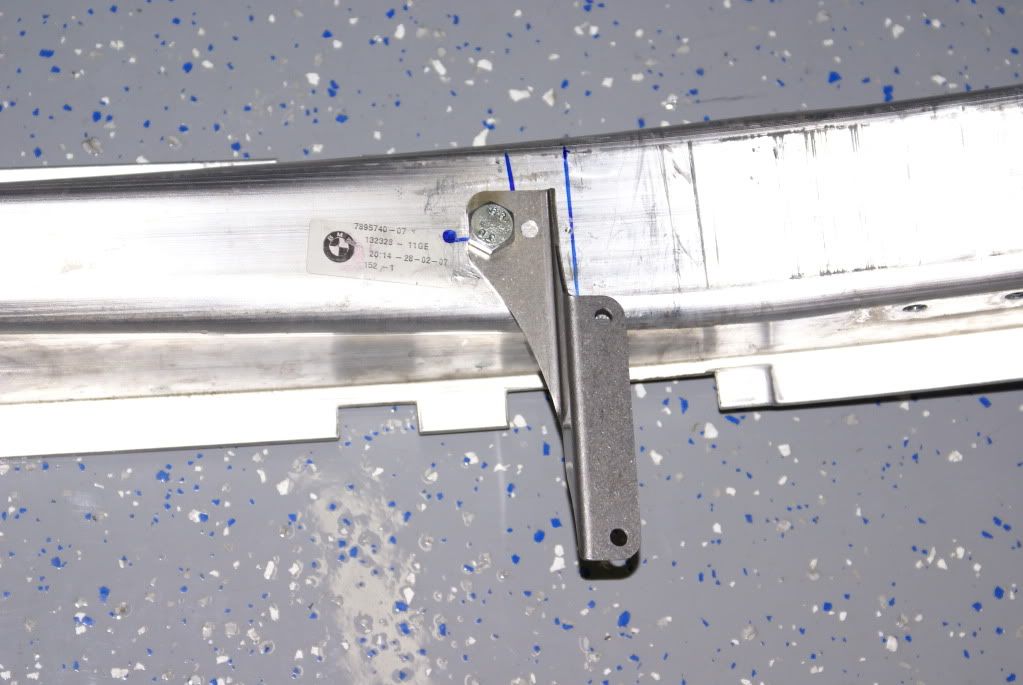
With that problem solved efficiently, we moved on to preparation to fit the front-mount heat exchanger for the charge cooling system. Supplied with the kit by G-Power were 4 rivet nuts which would be pressed into drilled holes in the aluminum bumper, along with 4 M6 threaded bolts. After trying to make this work, we realized this was not a rigid enough solution for this piece, which when filled with water, will be quite heavy, thus needing more support. We tapped the aluminum bumper carrier with 2 massive M10 bolts, and drilled the holes on the brackets bigger. They were then fitted with loctite red to ensure a permanent lock.
Bumper carrier with brackets on and bolts tapped/loctited:
Close up:
New heat exchanger mocked up on the car, note the small brackets/adaptors we had to make, due to the location needing to be moved up ~1/4". You can also see we successfully fitted the 2 tops of the intake manifolds, which house the charge coolers.
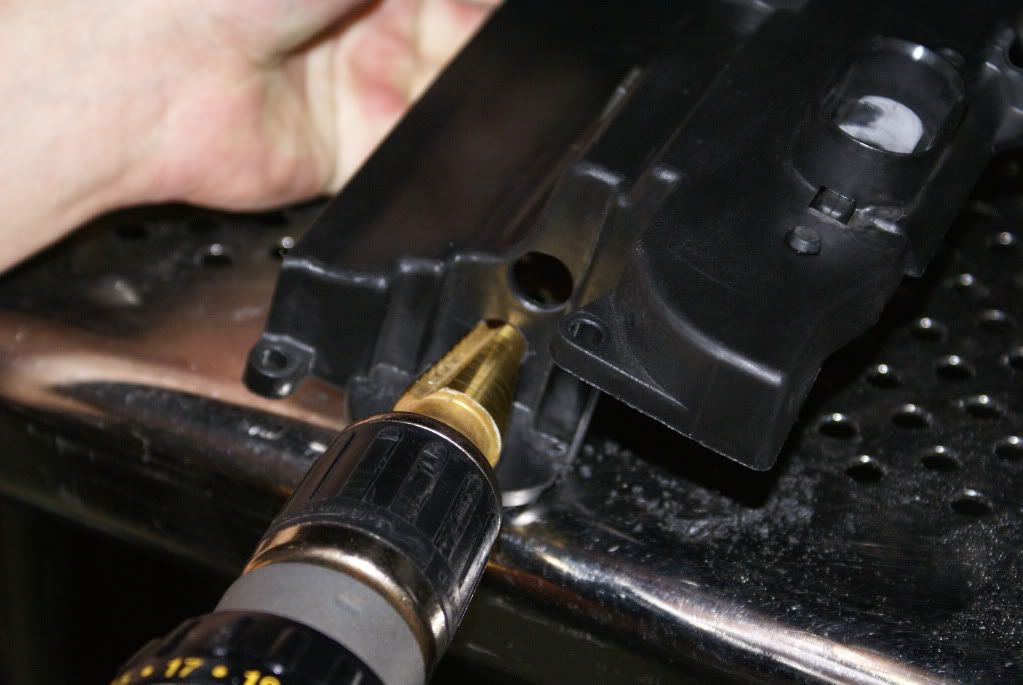
With that out of the way, now it was time to run the lines from the intake manifold/reservoir, to the pump and front mount. Another issue we decided to put our own spin on was the fitment of the lines passing by a plastic shroud that rests on top of the fan/radiator. Instead of going around it and potentially having a kink or pinch in the line, we decided it would be best to drill through it and fit the lines inside.
Here's the lines exposed, with no shroud yet. These are pretty large lines, and you can see where there is a fitment issue getting to the front mount.
Now we will drill and cut out the shroud to run the lines directly through them. Here we are drilling a couple pilot holes to then trim out with an airsaw:
Piece is complete and sanded down for OEM look, and optimal space for routing the lines properly, shown in the second picture:
The lines are now run, and we're ready to wire the pump, and fill the tank. . .and fire the car up for a test; stay tuned!!
...petrolhead 2007 E60 M5 Black Sapphire|Indianapolis Red
Thank you to everyone for your continued support and compliments on the installation!
At this time I'd like to say, we've officially scrapped the idea of a water/alcohol or methanol injection system. There are a couple reasons behind this, but the main reason is that G-Power does not support running methanol injection on cars equipped with their kit, and it may have eventually resulted in a void warranty from G-Power for our customer.
Originally we were going to run methanol injection not as a "power-adder," but rather as a knock suppressant, even if not "needed." Now, we are going to see how the car runs straight away as G-Power has intended.
We'll do our best to have some videos and dyno numbers as soon as possible.
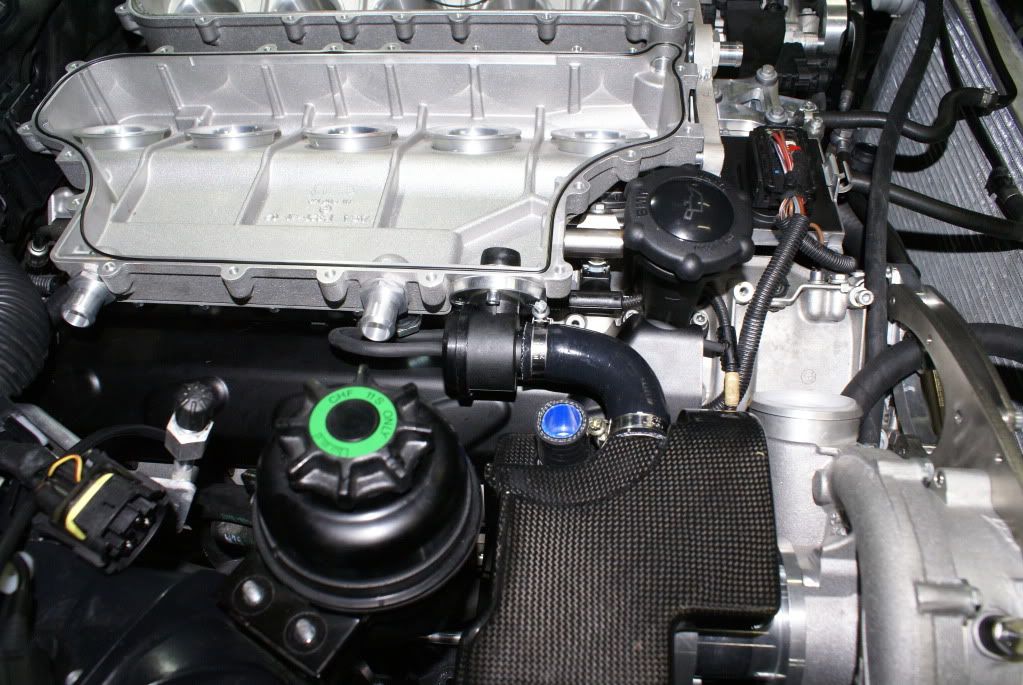
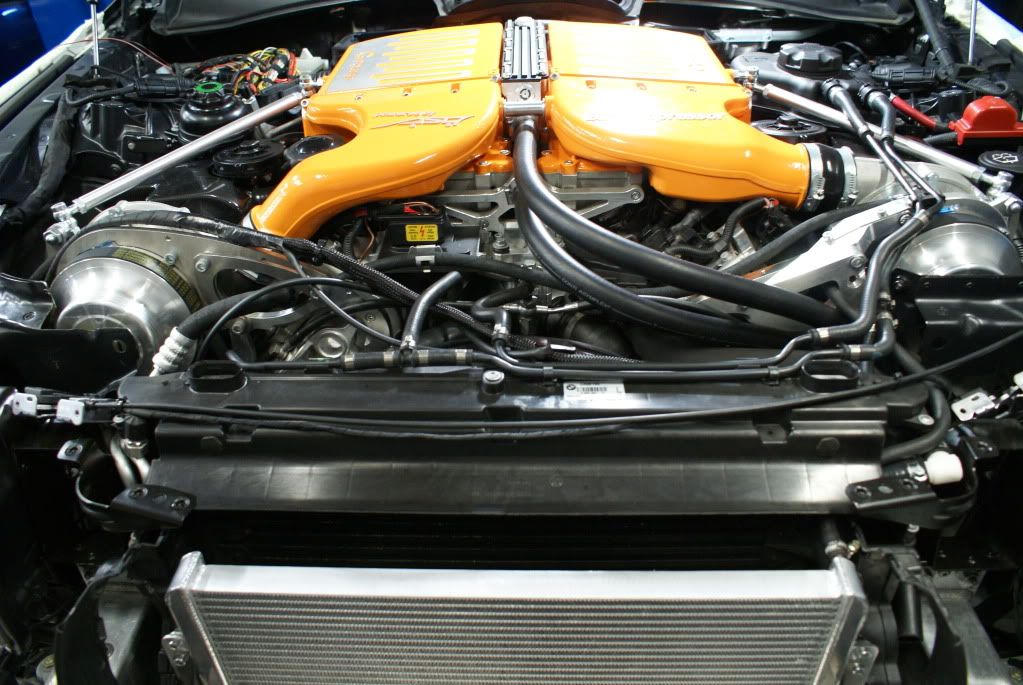
For now, we can pretty much say the installation is about 95% done, with the only things left being last minute tweaks for adequate clearances, and the gauge wiring/pod installation. . .and that pretty carbon fiber plate to cover up the wiring/plumbing network in front of the intake manifolds. The car fired right up on the first shot, and idled fairly smooth. After some adaptation values were cleared, it ran even better.
Here's a picture of where we currently stand, as you can see, the project is nearly complete looking.
We'll be back with more updates within the next few days. . .and well beyond the completion of the kit. This car will be going through a metamorphasis of aesthetics as well as performance, with a Vorsteiner hood, HRE wheels, H&R springs, and Brembo brakes. . .we hope you'll stick around to watch the change as these things begin to trickle in and make their way onto the car!
...petrolhead 2007 E60 M5 Black Sapphire|Indianapolis Red
My apologies once again for the lack of updates. As I said in the previous post, we let the customer take the car about a week ago to "shake down" the kit, and find any and all kinks associated with it. After a successful run-in of the kit by the customer, the car is now back in our possession.
On the list of things to complete this visit are run the wiring for AFR and boost gauges into our gauge pod in the cabin, weld a bung in the connecting pipe on the exhaust for the wideband, neaten up a few wires and tie up a few loose ends to make the kit look complete. If we have time we'll install the H&R sport springs that are waiting to go on the car.
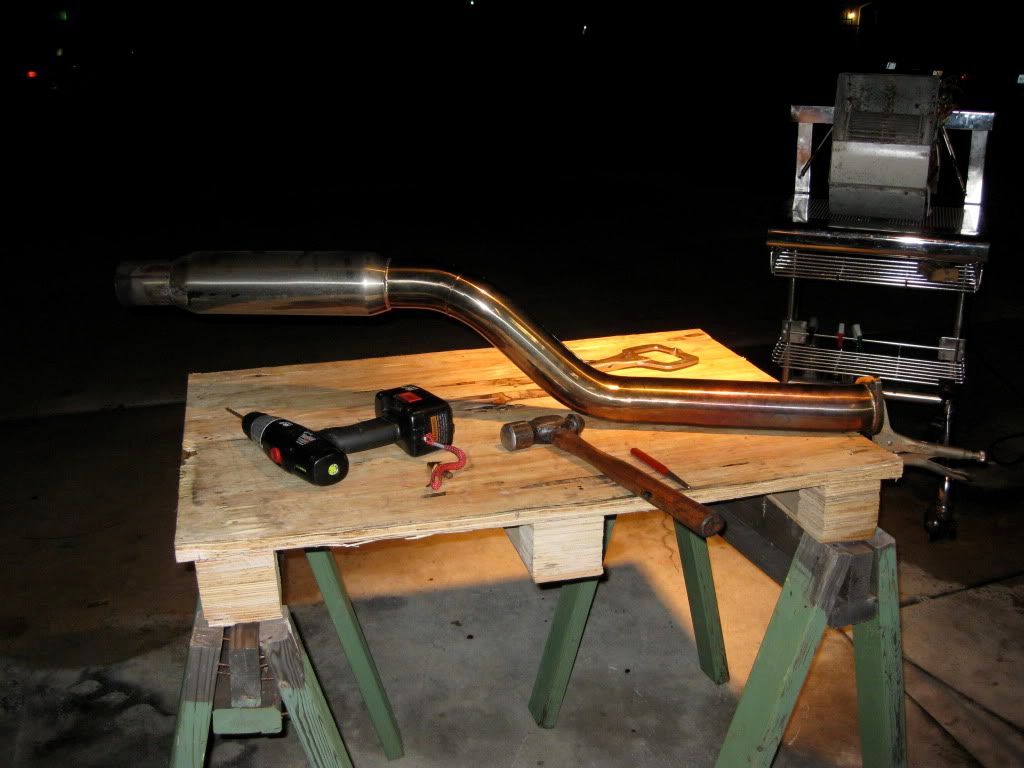
Let's get started with the exhaust and the bung for the wideband. Here's the Active Autowerke driver's side connecting pipe on a temporary work table, preparing to get cut and welded:
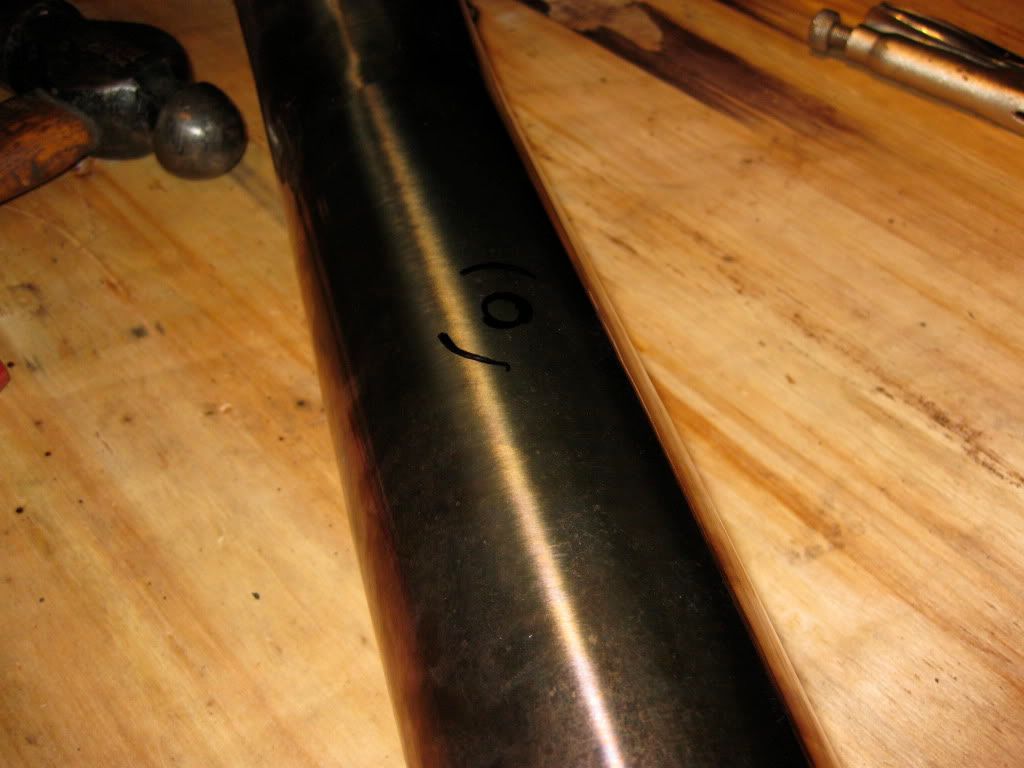
From previously being mocked up on the car, the bung location stenciled:
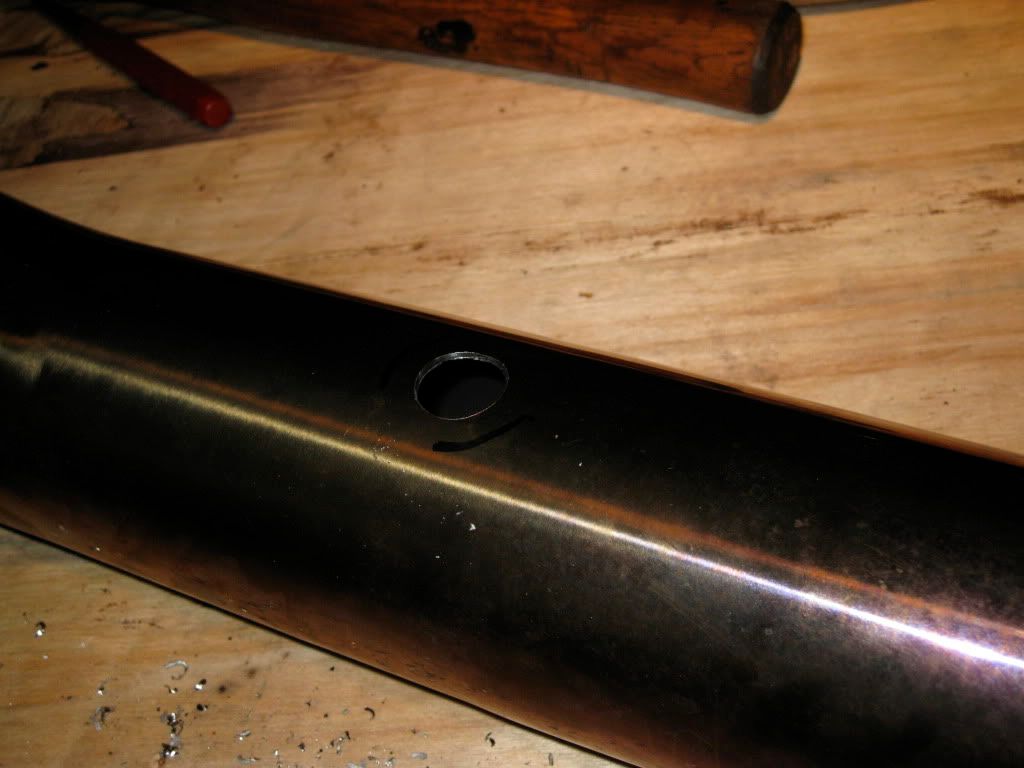
Hole drilled for the bung/wideband's entry to the exhaust stream:
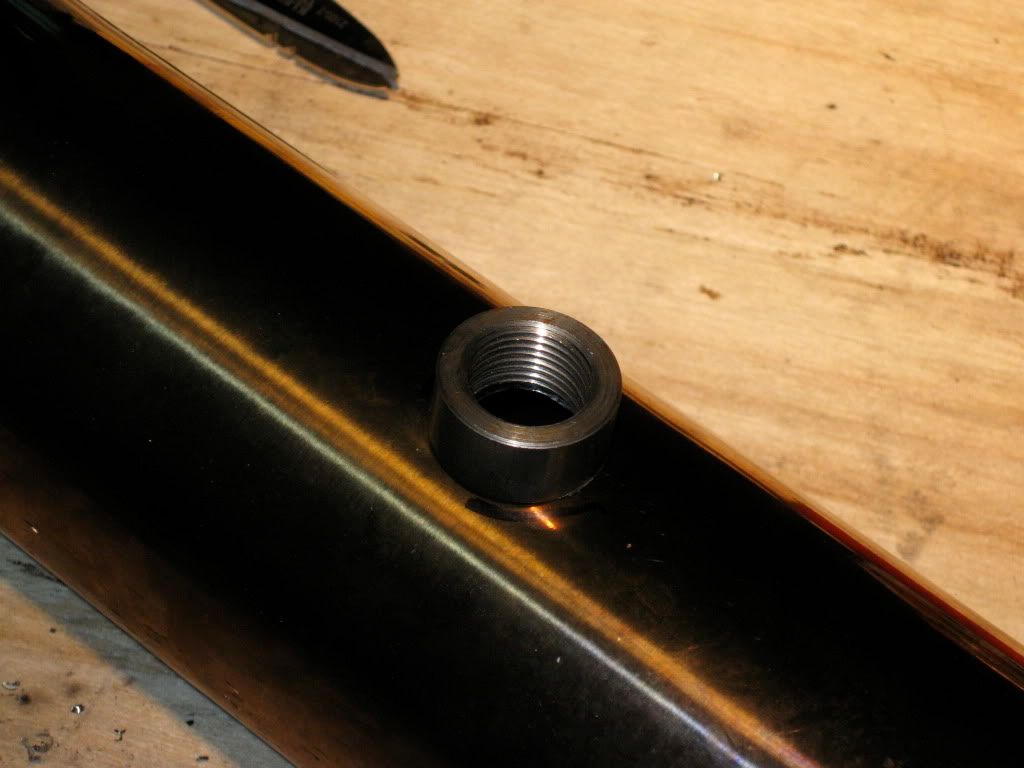
Measuring the contour of the connecting pipe, so we can accurately shape the bottom of the bung to fit perfectly:
A perfect fit! Just before welding
Bung now MIG welded in place(crappy pic, hand slipped while using point and shoot camera):
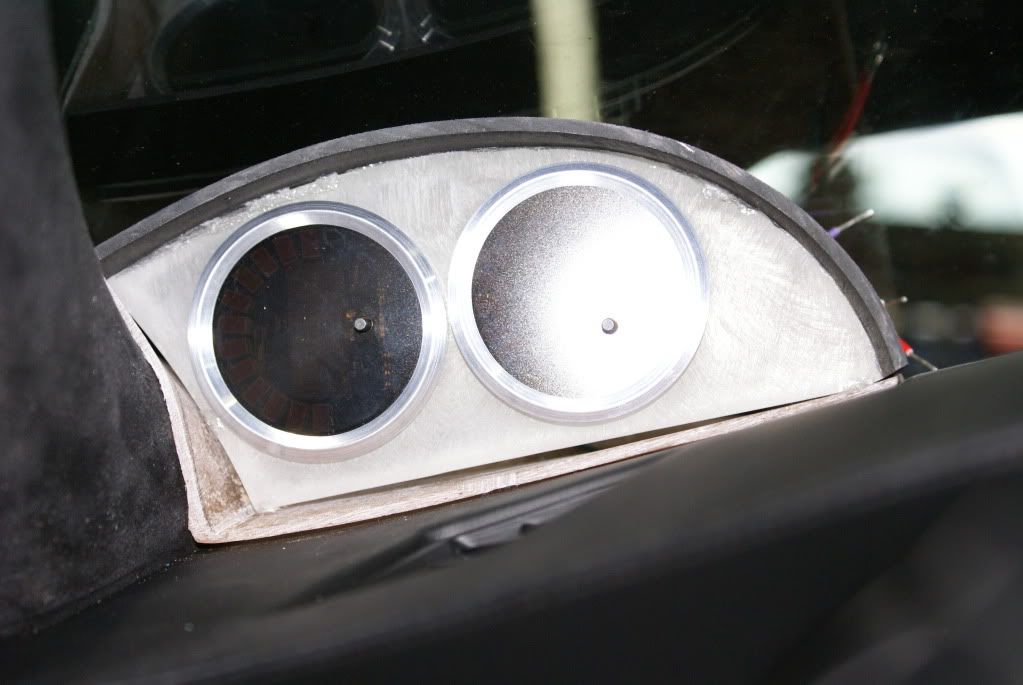
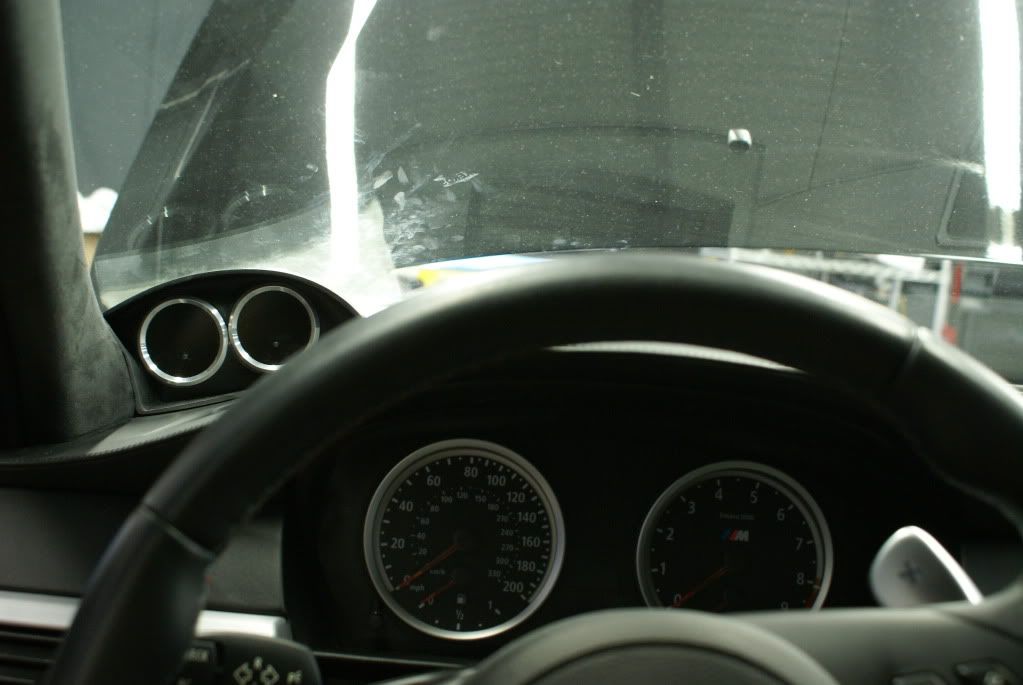
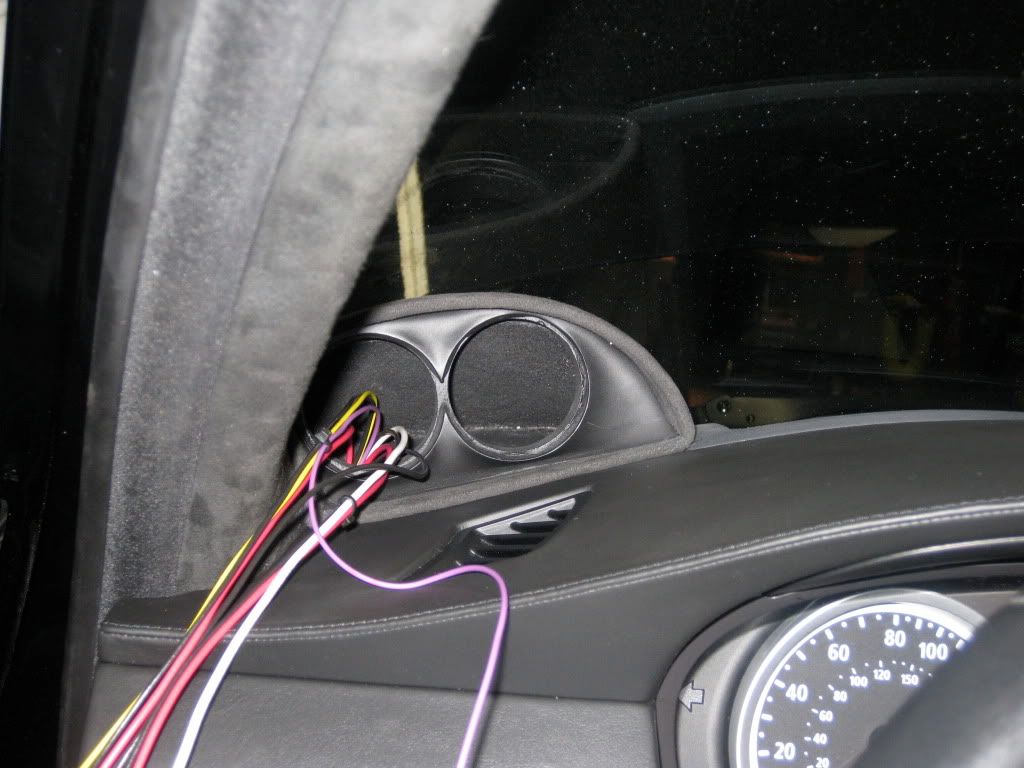
With that out of the way, now we were ready to start routing the wiring for the gauges. Here's a quick picture showing the wiring coming out of the gauge pod, nearly ready to connect to the gauges:
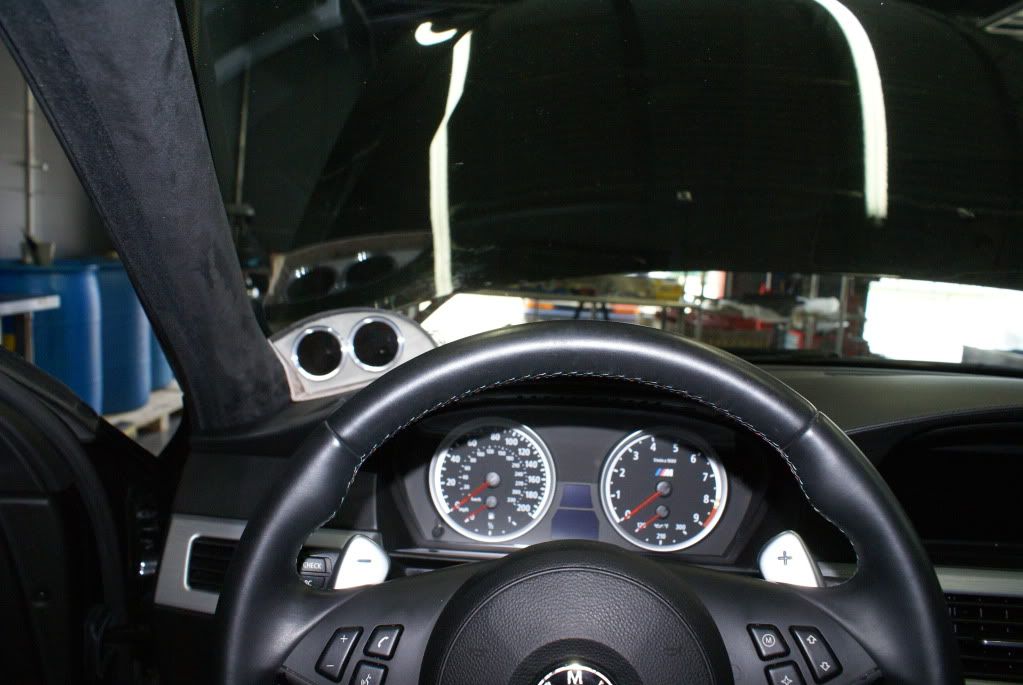
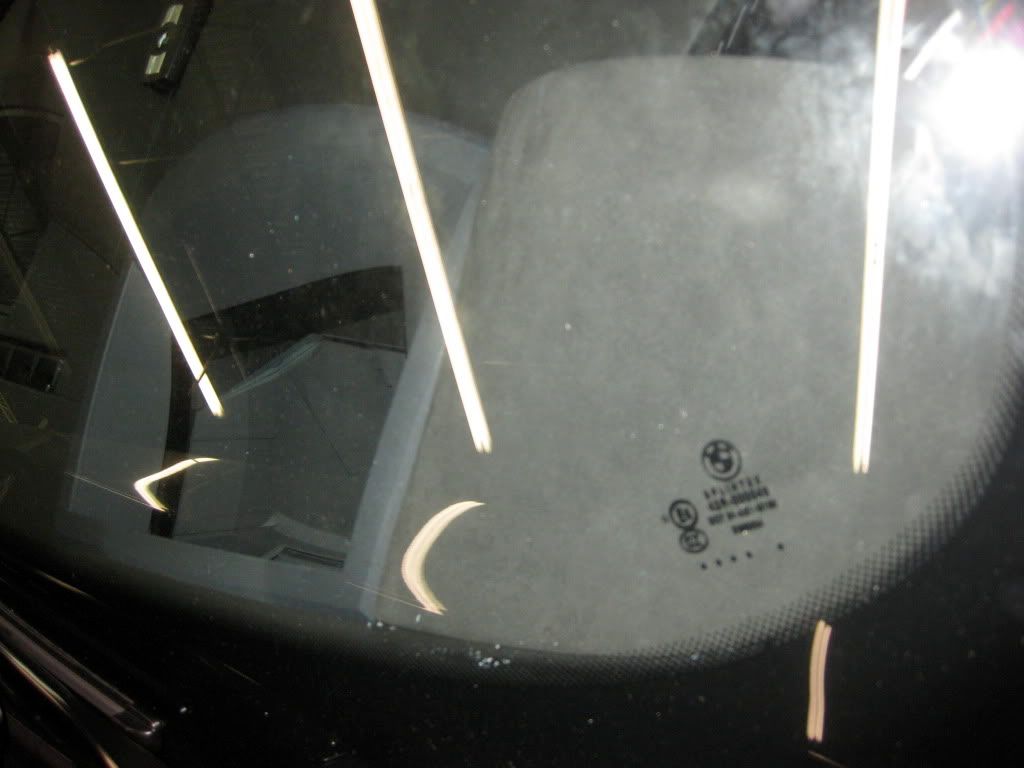
View from the top, outside the windshield. Note the contours of the pod flow with the lines on the dash top flawlessly.
That's about where we're at right now. . .as usual more updates to follow very shortly when the gauges are fully run and powered up, and the pod is complete and in place for good.
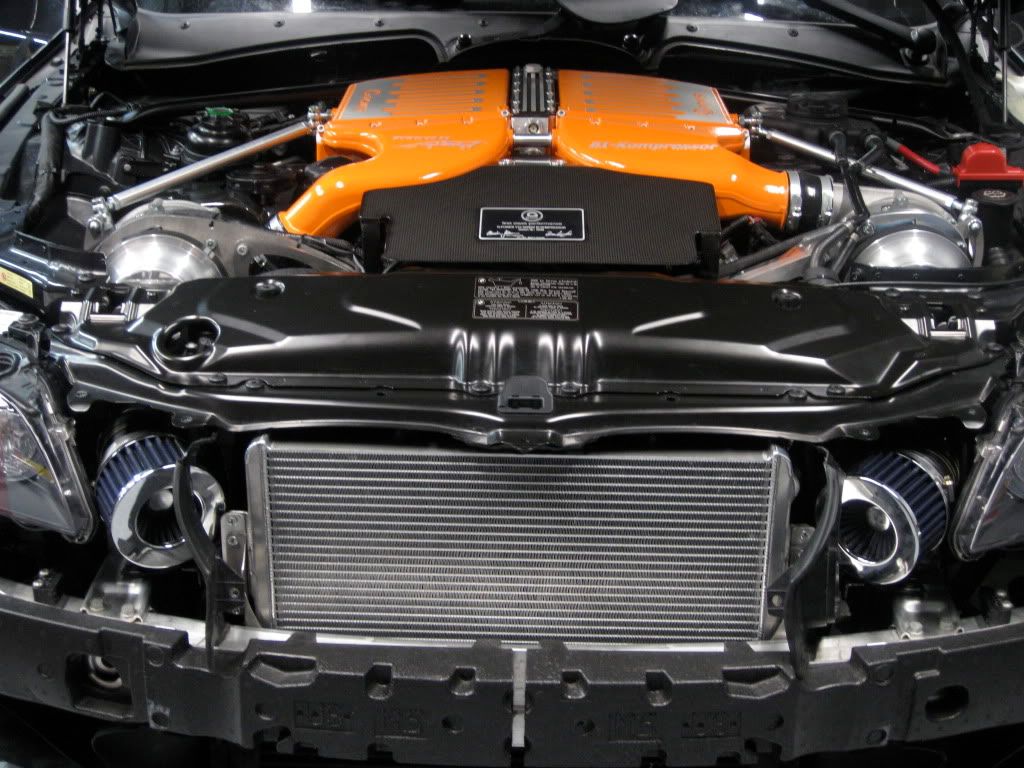
For now, a few teaser shots of the "95% complete" engine bay. Note we mounted the water cooler a bit higher than G-Power recommendation, but we feel it provides more surface area to incoming air to cool the water/charge. Enjoy the pics!
...petrolhead 2007 E60 M5 Black Sapphire|Indianapolis Red


Comment